


Automount ext4 USB hard disk and serve shares with Samba
Disk preperation
Plug in the USB Hard Disk (it’s better to use a independent powered usb hub to power both pi and the disk) and type the following command to check if it’s recognized:
|
1 2 3 |
fdisk -l |
If it’s everything good, you will see your hard drive listed as sda1 in the bottom. Now type these commands:
|
1 2 3 |
sudo mkfs.ext4 /dev/sda1 -L disknamehere |
To format our drive from NTFS to ext4, a native linux partition. We do that because many people complained about low speeds on write with ntfs-3g driver.
|
1 2 3 4 |
sudo mkdir /media/hdd0 sudo mount -t ext4 /dev/sda1 /media/hdd0 |
They will create a mount point called “hdd0” on media folder and mount our usb drive to it, so it can be accessible.
Now we need to create a shared folder, type this:
|
1 2 3 |
sudo mkdir /media/hdd0/shares |
Samba installation
Now it’s time to install Samba so we can access the storage from elsewhere on the network. At the command line enter:
|
1 2 3 |
sudo apt-get install samba samba-common-bin |
When prompted to continue type Y and enter. Sit back and relax as everything unpacks and installs. Once the Samba package finishes installing, it’s time to do a little configuration. Before we do anything else, let’s make a backup copy of the Samba configuration file in case we need to revert to it. At the command line, type the following command line:
|
1 2 3 |
sudo cp /etc/samba/smb.conf /etc/samba/smb.conf.old |
This simply creates a backup of the configuration file with the filename smb.conf.old and leaves it in the same directory as the original configuration file.
Once we’ve created the backup it’s time to do some basic editing in the Samba config file. Type the following at the command line:
|
1 2 3 |
sudo nano /etc/samba/smb.conf |
Nano is completely keyboard controlled, use the arrow keys to move the cursor to the location you want to edit. As you click down through the configuration settings, you’ll see a few worth making note of or changing.
The first is the workgroup identifier, by default workgroup = WORKGROUP. If you’re using a different name for your home workgroup, go ahead and arrow over to change that now, otherwise leave it as the default.
Now scroll down and add:
|
1 2 3 4 5 6 7 8 9 10 |
[Backup] comment = Backup Folder path = /media/hdd0/shares force user = "root" force group = users create mask = 0777 directory mask = 0777 read only = no |
This will make shares brosweable and writeable by anyone.
Samba user authentication
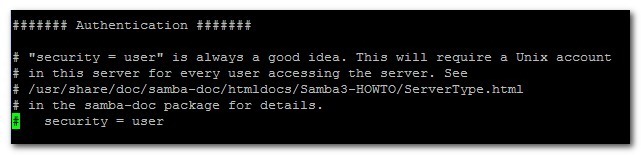
If you don’t wont full access to shares, you have to turn on user authentication for our samba storage, otherwise anyone with general access to our network (like guest Wi-Fi users) will be able to walk right in. Scroll down in the Samba config file until you get to the section that reads:
Remove the # symbol from the security = user line (by highlighting it with the cursor and pressing delete) to enable username/password verification for the Samba shares.
Next, we’re going to add an entirely new section to the configuration file. Scroll all the way down to the very bottom of the file and enter the following text:
|
1 2 3 4 5 6 7 8 9 10 |
[Backup] comment = Backup Folder path = /media/hdd0/shares valid users = @users force group = users create mask = 0660 directory mask = 0771 read only = no |
Note: Whatever you put in the brackets in the top line is going to be the name of the folder as it appears on the network share. If you want another name other than “Backup” now is the time to edit it.
Press CTRL+X to exit, press Y when asked if you want to keep changes and overwrite the existing configuration file. When back at the command prompt enter the following command to restart the Samba daemons:
|
1 2 3 |
sudo /etc/init.d/samba restart |
At this point we need to add in a user that can access the Pi’s samba shares. We’re going to make an account with the username backups and the password backups4ever. You can make your username and password whatever you wish. To do so type the following commands:
|
1 2 3 4 5 |
sudo useradd backups -m -G users sudo passwd backups |
You’ll be prompted to type in the password twice to confirm. After confirming the password, it’s time to add “backups” as a legitimate Samba user. Enter the following command:
|
1 2 3 |
sudo smbpasswd -a backups |
Enter the password for the backup account when prompted. Once you have created the user account and password you do not need to restart the Samba daemon again as we’ve already instructed it to be on the lookout for authenticated users. We can now hop onto any Samba-capable machine on our network and test connectivity to the network share.
Automount the hard disk
Now we need to configure our Pi so that when it restarts it will automatically mount the external hard drives. To do so we need to fire up the nano editor and make a quick edit. At the command line type:
|
1 2 3 |
sudo nano /etc/fstab |
This will open up the file systems table in nano so we can add a few quick entries. Within the nano editor add the following lines:
|
1 2 3 |
/dev/sda1 /media/hdd0 auto noatime 0 0 |
Press CTRL+X to exit, press Y to save, and overwrite the existing file.
If you’re only using a single hard drive for simple network sharing with no redundancy, then that’s it! You’re all done with the configuration process and can begin enjoying your ultra-low power NAS.
Other filesystems that could be used instead
Add Apple OS X HFS+ read/write support and format it:
|
1 2 3 4 5 |
sudo apt-get install hfsutils hfsprogs hfsutils sudo mkfs.hfsplus /dev/sda1 -v disknamehere |
Add Windows NTFS read/write support and format it
|
1 2 3 4 5 |
sudo apt-get install ntfs-3g sudo mkfs.ntfs /dev/sda1 -f -v -I -L disknamehere |
Add Windows/DOS FAT32 read/write support and format it
|
1 2 3 4 5 |
sudo apt-get install dosfstools sudo mkfs.vfat /dev/sda1 -n disknamehere |
Usefull tips
To list your file systems:
|
1 2 3 4 5 |
sudo fdisk -l sudo mount -l df -h |
Before disconnecting a USB drive:
|
1 2 3 |
sudo umount /dev/sda1 |
bla bla!